Adventures in Woodworking - Part 10
Mar 28, 2017 | Samantha Dyck, Operations Manager, Hard Hat Hunter

The Goldilocks of Screw Sizes
I started off this week’s carpentry class at Canadore by finishing up attaching the bottom piece to make the rail of my coffee table. I used quick clamps to attach the semi-built frame and the rail to my work surface. From there, I drilled in 2 ½” screws through my pocket holes. Ta-da! Two sides of the frame of my coffee table assembled!
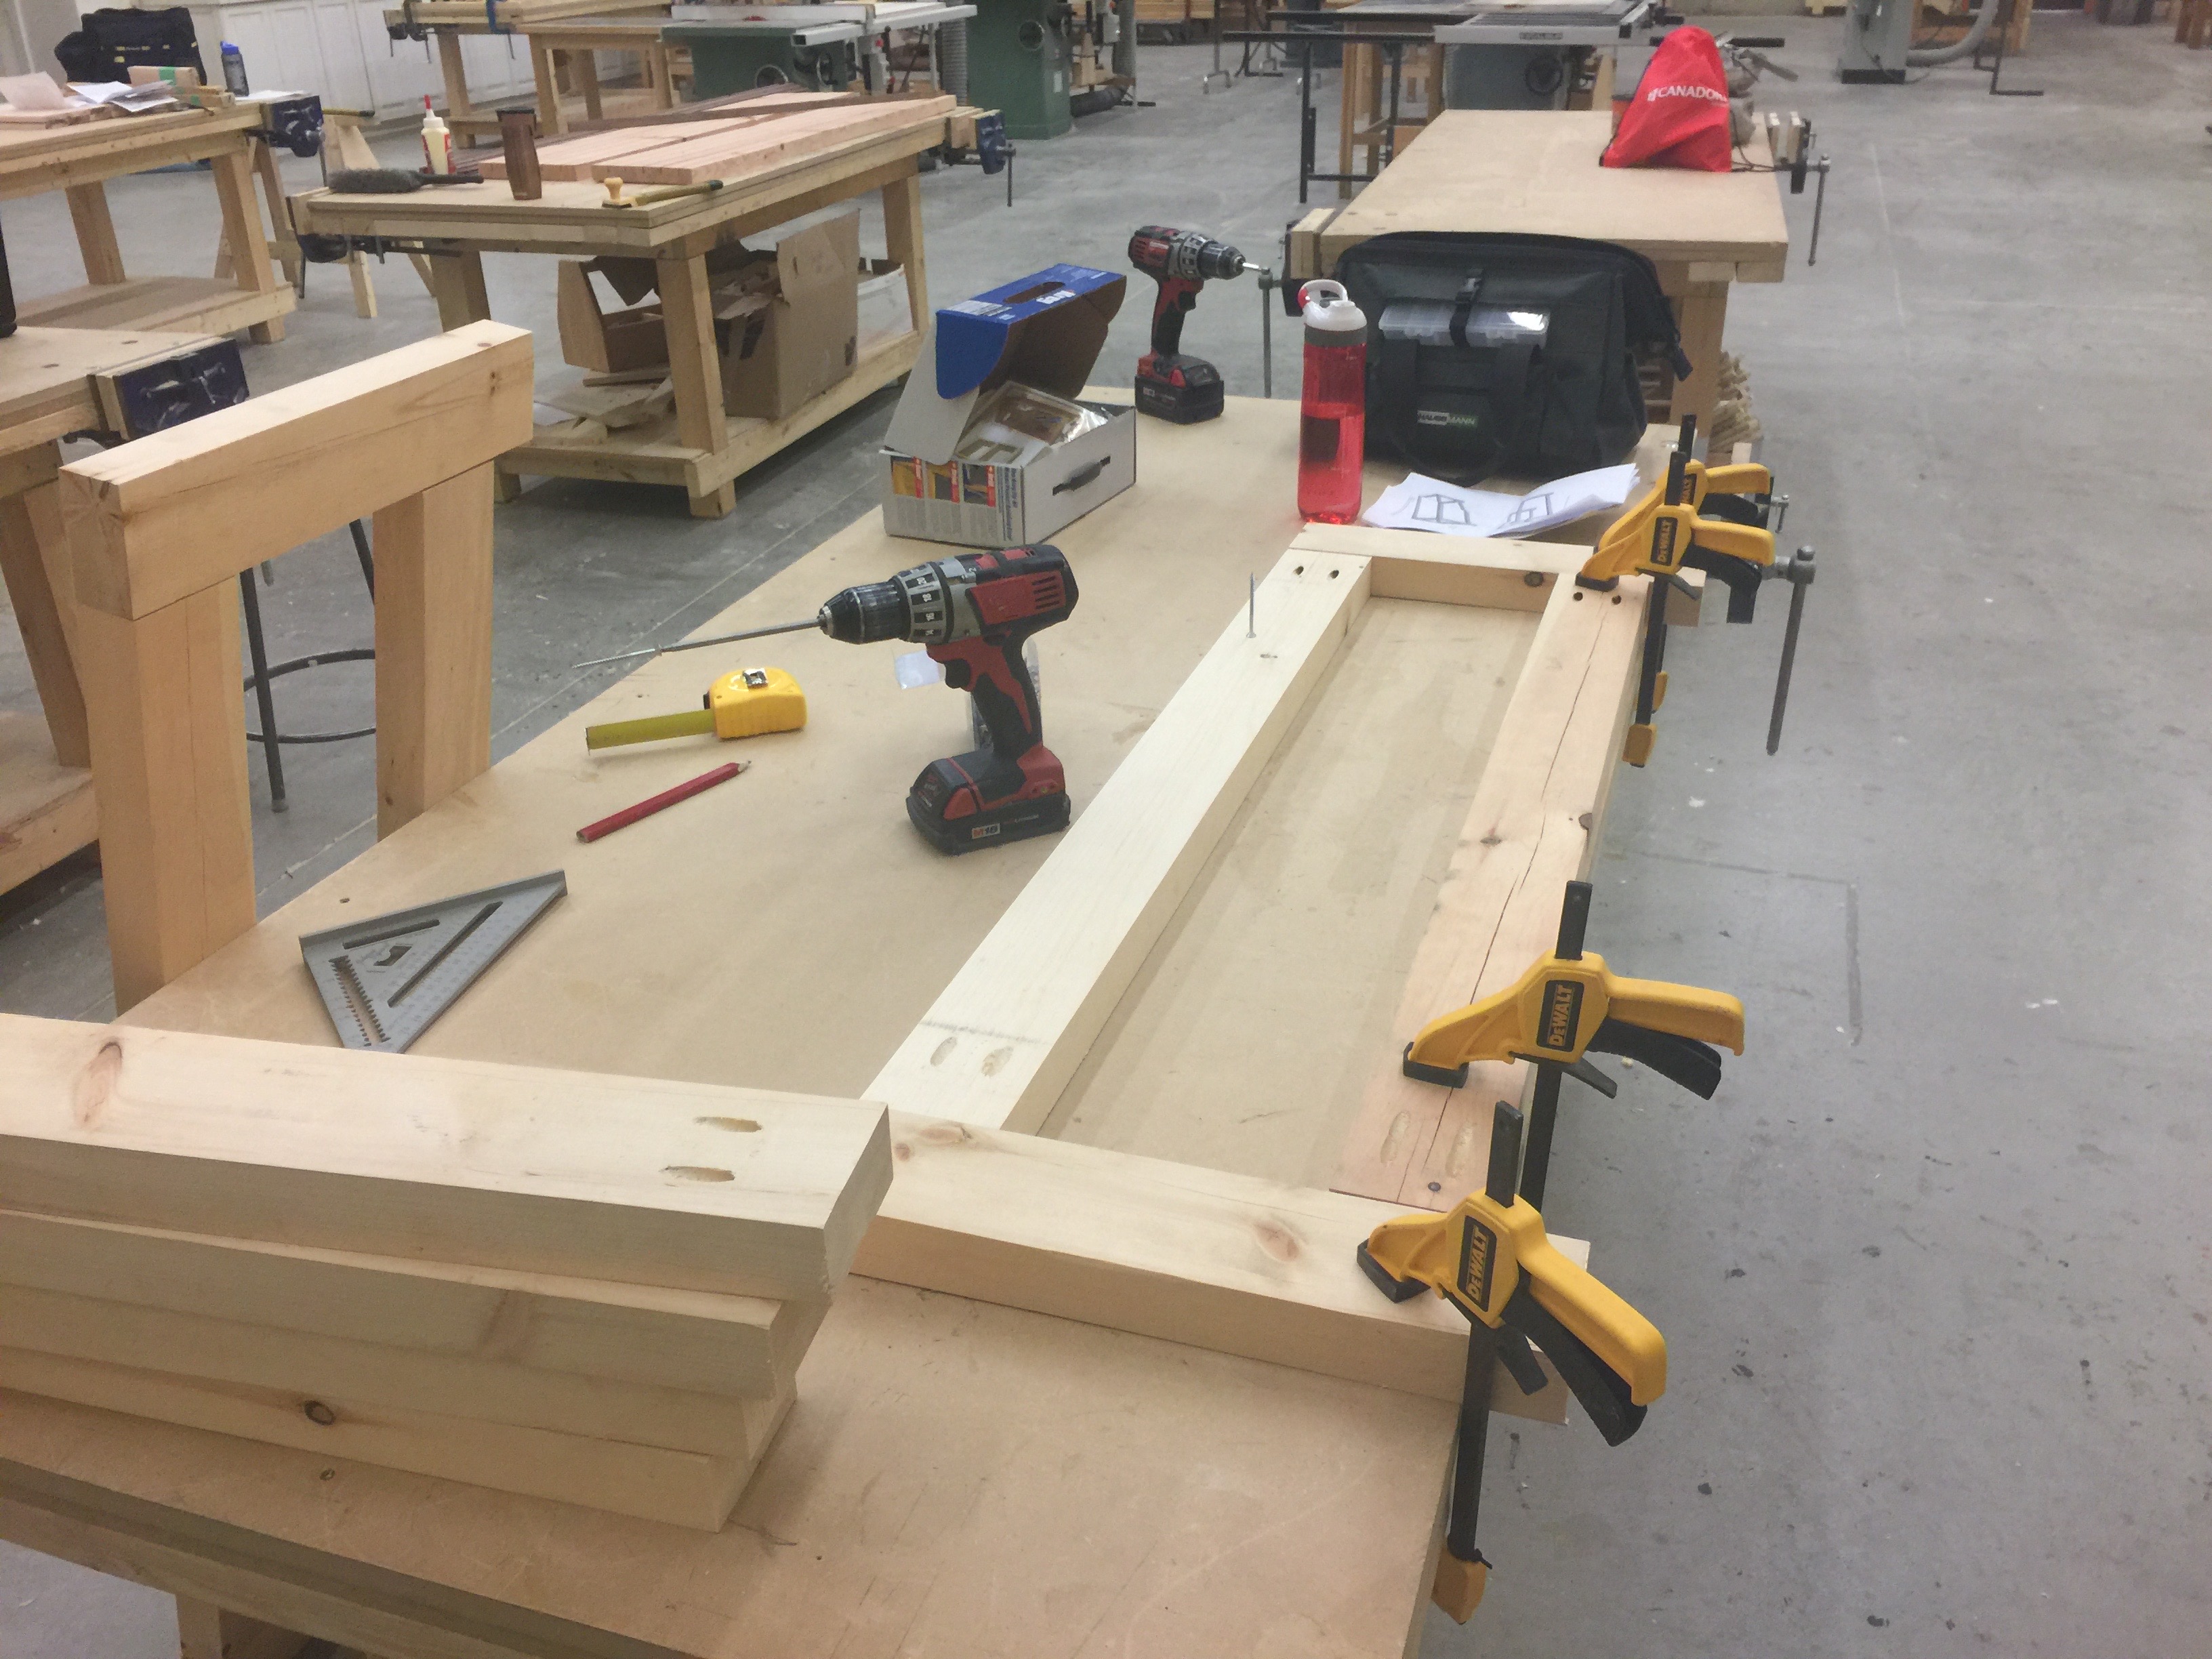
Next, I needed to attach the two sides. I grabbed my 4 pieces of 22 ½” side rails that I had previously drilled pocket holes into. I started by flipping the piece upside down and clamping it to the work table with heavy duty clamps. It took quite a few to get the piece flush with the work surface and sturdy.
Since the 2 ½” screws were too long and would poke through the top, I needed to use shorter screws. I decided to use 1 ¼” screws, and attached the top two rails with relative ease. After I removed the clamps, I realized that the screws were, in fact, too short and didn’t grab onto the adjoining piece of wood.
The screws were in too far to easily be removed with the drill. Using Adam’s trick, I grabbed a spare piece of wood and pushed it against the point of the screw. With pressure on the tip, I was able to remove the screws.
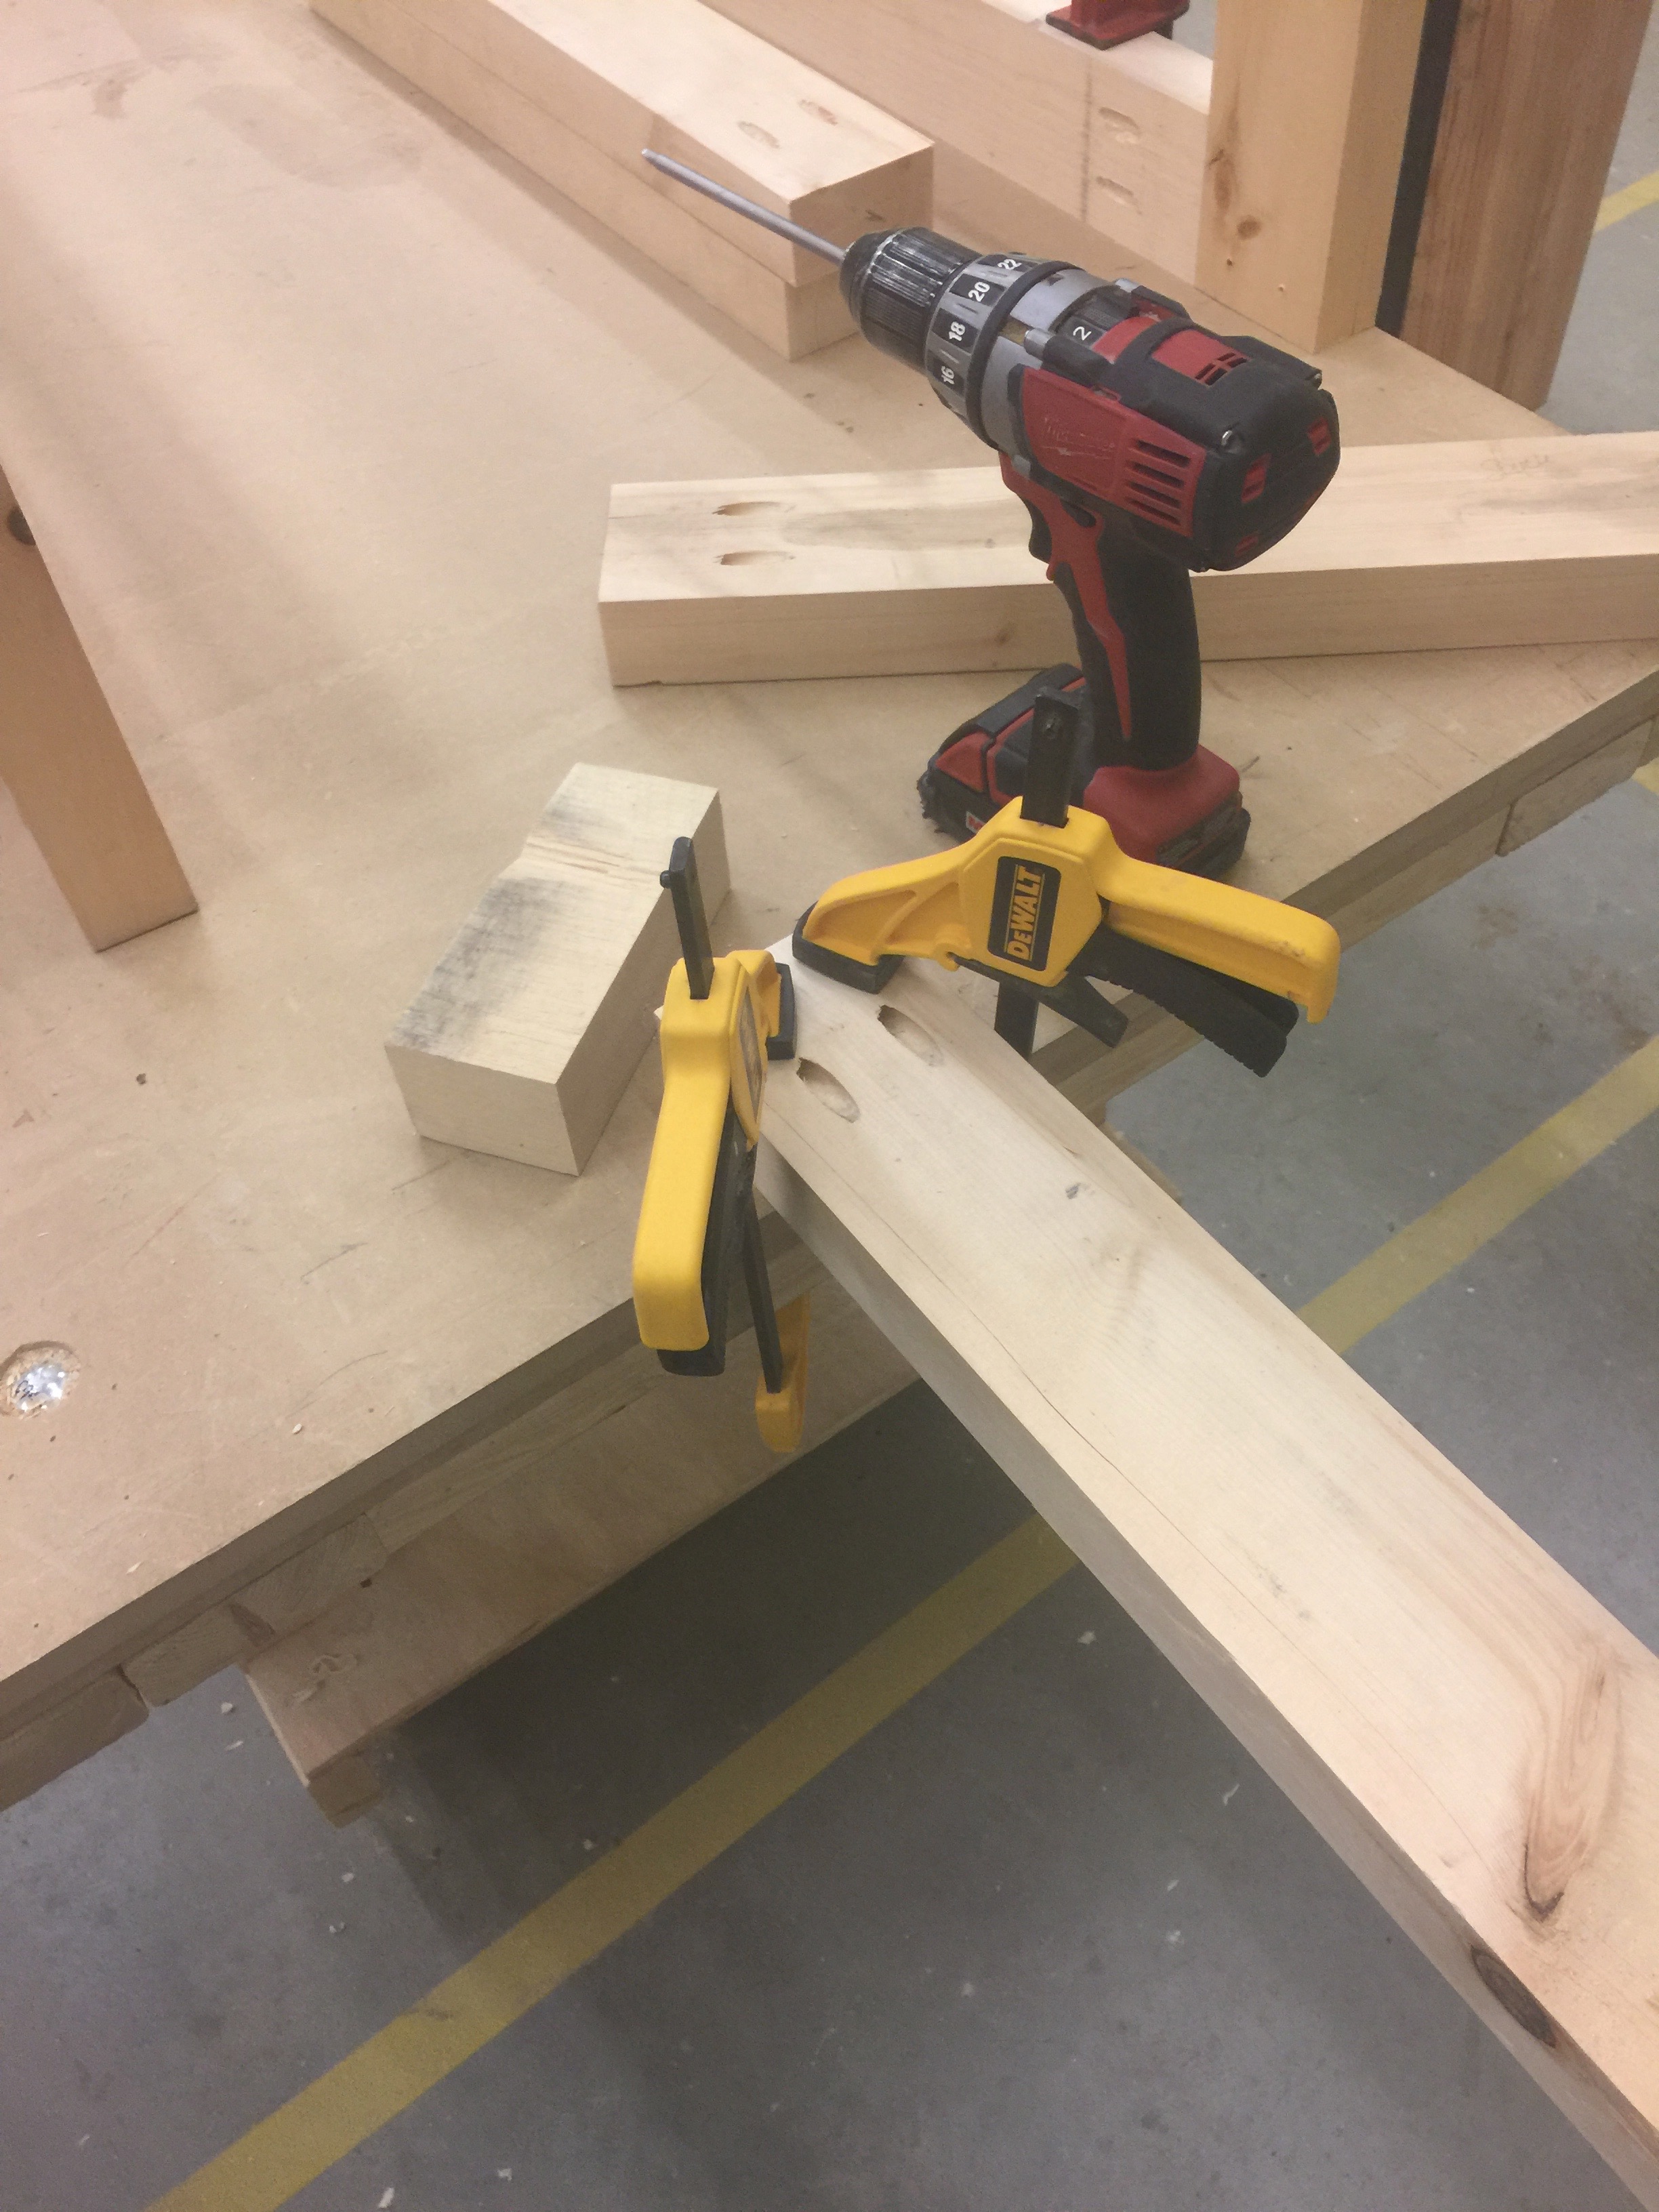
Next, I searched the supply closet for the Goldilocks of screw sizes. 2” was too long. 1 ¾” would work juuuuuuuuust right. Perfect. I reattached the bottom pieces, and they seemed to work.
Assembling the Frame (Again)
For the next step, I needed to flip the entire unit. As I went to move it, it became evident that my most recent effort was not effective. The whole unit broke into 2 “L” shaped pieces. Boo!
Examining the broken pieces, I realized I had run into two issues:
-
I didn’t have the tension set on the chuck of my drill
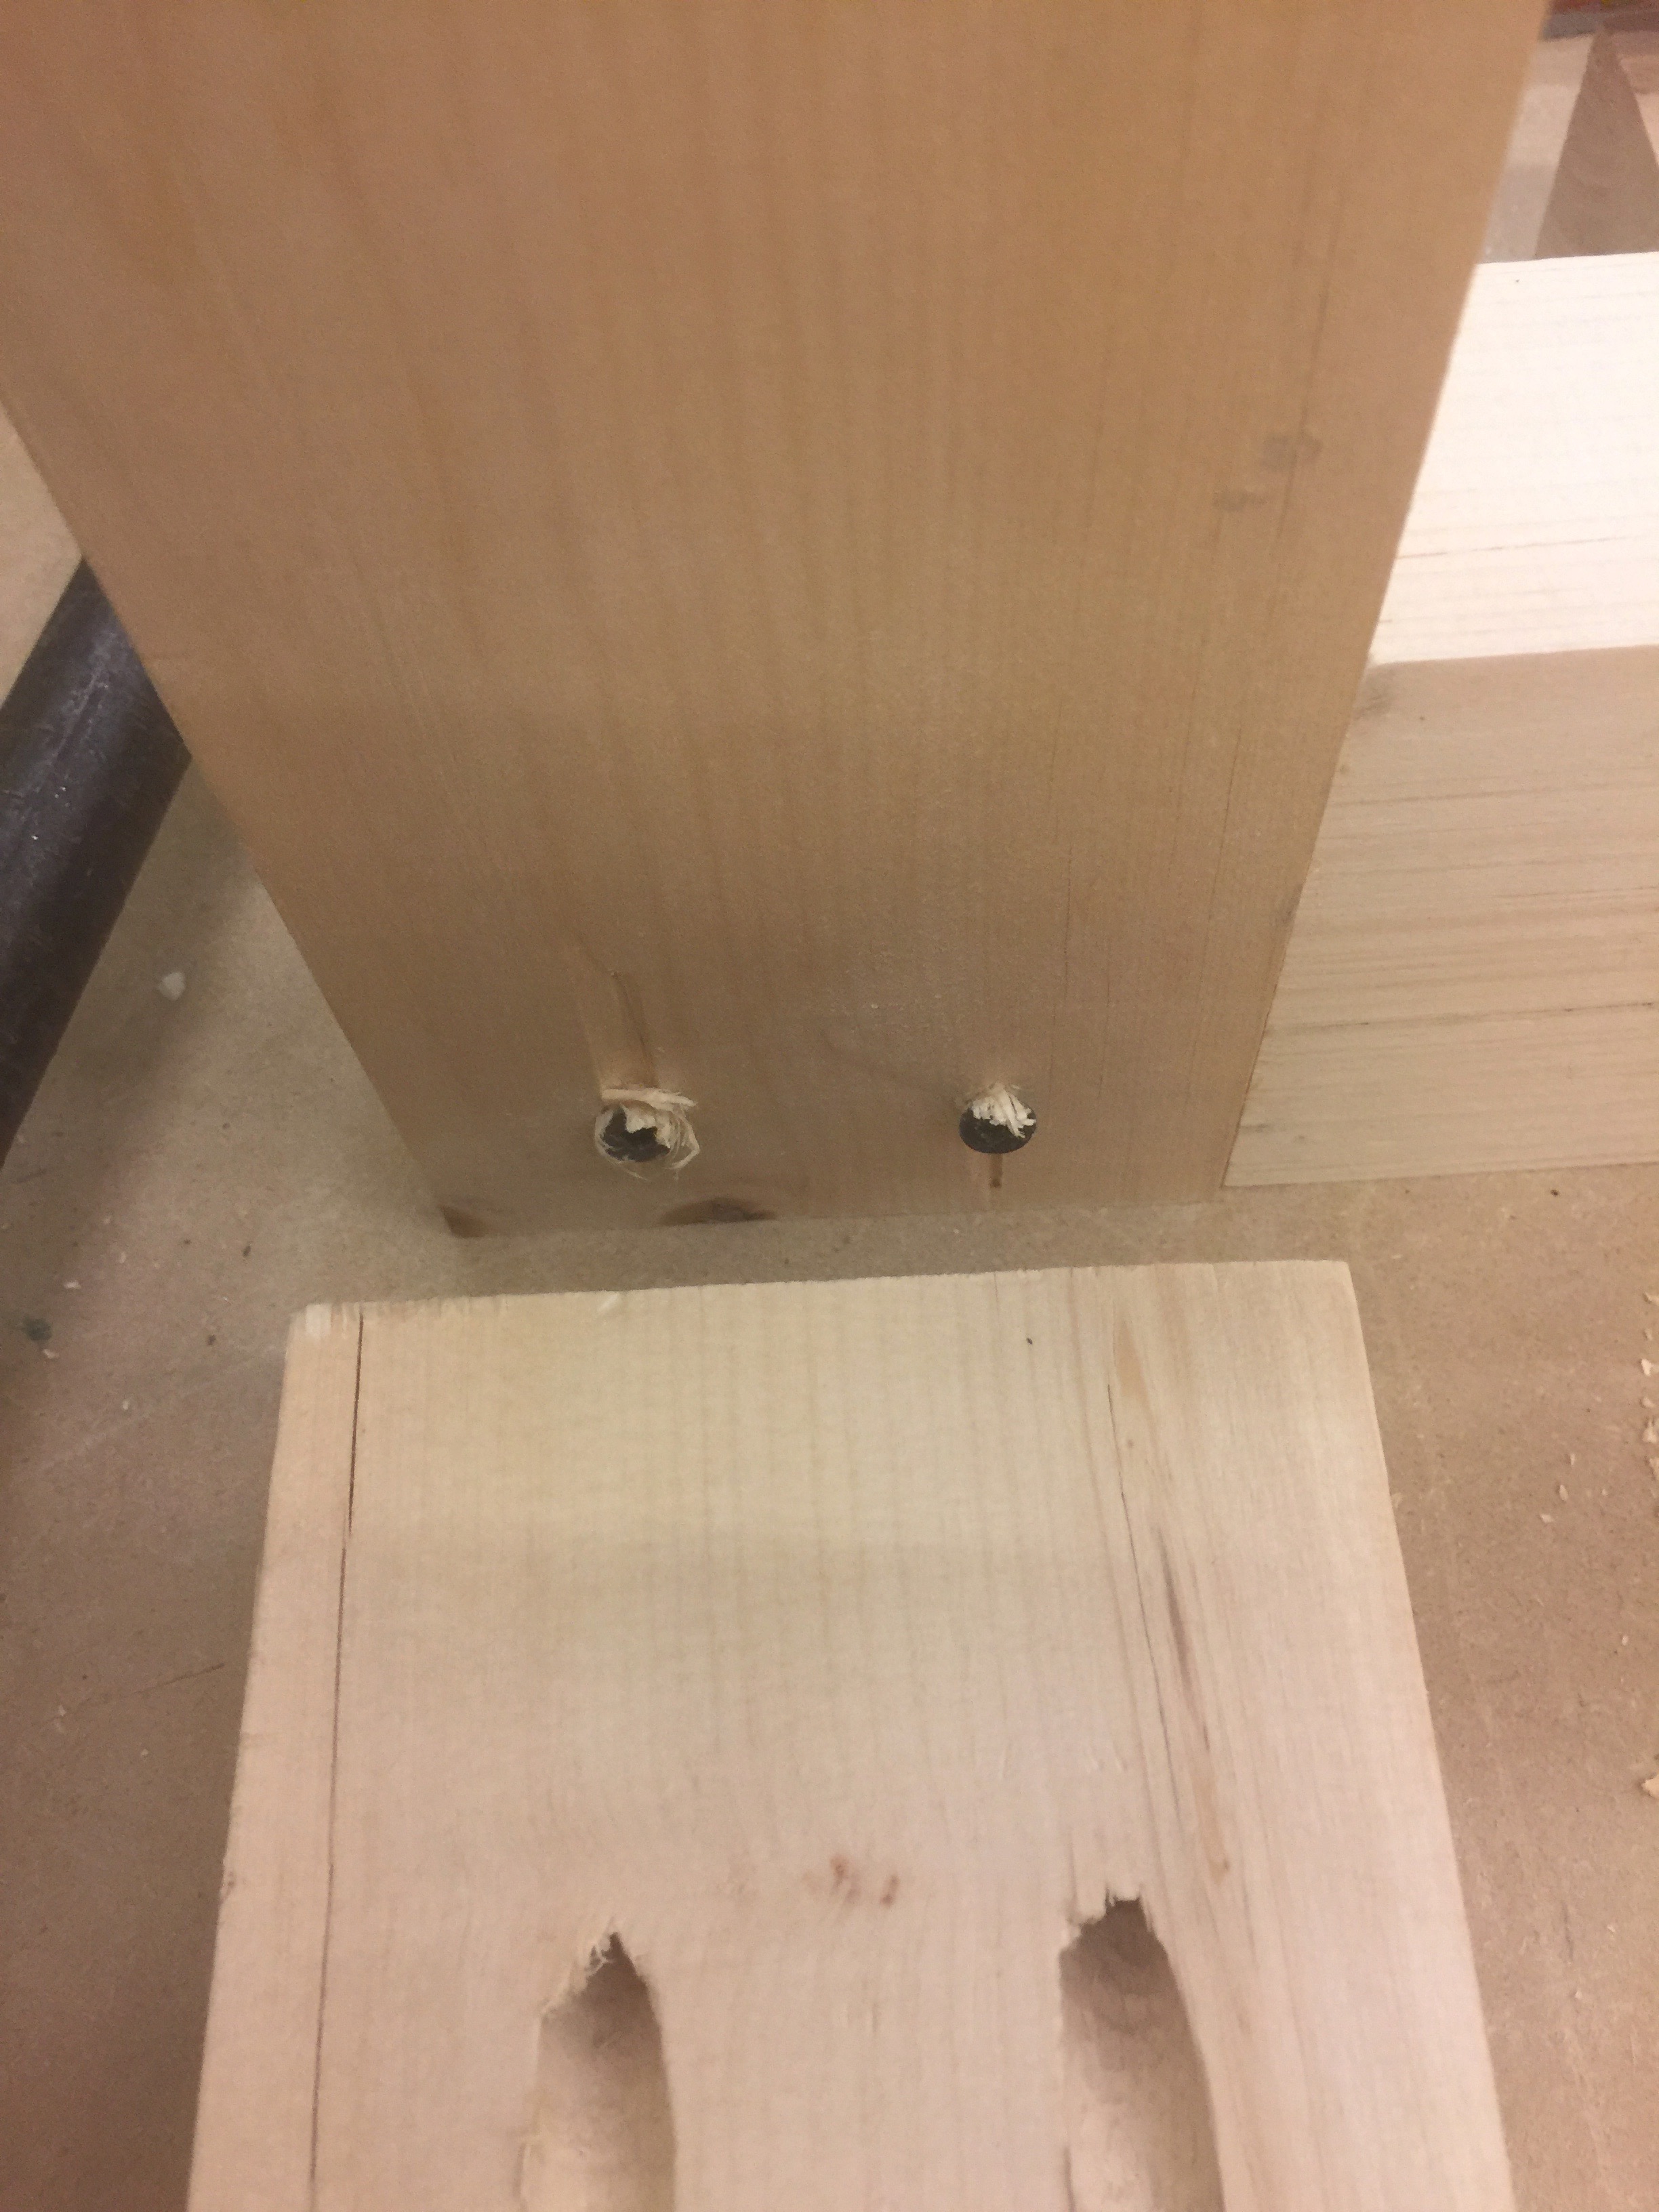
In the last class, Adam had set the drill so it only allowed me to go so far into my adjoining piece of wood. It had this sort of soft kick back (not the technical term, I’m sure) to alert me that I had inserted the screw enough. Without this tension limit set, I went right through my piece of wood, waiting for the kick back that never came.
-
Different threading on screws
Because I had originally used 1 ¼” screws (which were too short), I made sure to use the same thickness of screw when I used 1 ¾” screws to replace them. What I hadn’t thought to check for was the width of the threading on the screws. On the 1 ¼” screws it was much narrower than the ones on the 1 ¾” screws- so they didn’t grab the way they should have.
I should probably admit that I was pretty frustrated at this point. I didn’t want to have to purchase more lumber, and restart the whole process. So instead, Adam helped me to MacGyver the pieces. We attached them with holes through the top of the wood. I figured it was the underside of the table, so chances are no one would ever actually see it.
Onto the next step….
Three Out of Four is a Pass, Right?
Now that the top of the frame was all attached, I needed to attach the bottom rail piece to complete the frame of the coffee table.
The plans stated that the bottom rail needed to sit 2 ¼” from the base of the leg. In order to set that up, I used a measuring tap to measure 2 ¼” from its bottom. Next, I used my speed square to mark the piece.
This is where it got interesting. I had to insert the rail piece on the 2 ¼” line, then attach a clamp to hold it in place, effectively doing two things at once (not my forte). With a huge amount of struggle, I managed to get one side set up. But the second side would NOT cooperate in the slightest.
I grabbed my speed square to check and see if the issue was the rail assembly, and figured out that 3 of 4 of my corners were square. One was a little off.
I also realized that, on my side that was giving me trouble, the 22 ½” piece of wood was actually ¾” shorter. This explains why my corner isn’t square, and why my 22 ½” piece wasn’t fitting into the spot.
Realistically, I knew that, as my second big project, it wasn’t going to perfect. I accepted this flaw, and decided to trim the piece to be identical in size as the mis-cut one.
Now that it fit, I attached it with a clamp and then screwed all 4 corners into place. Now I have the frame of the table assembled! Check it out. I think it looks pretty snazzy.
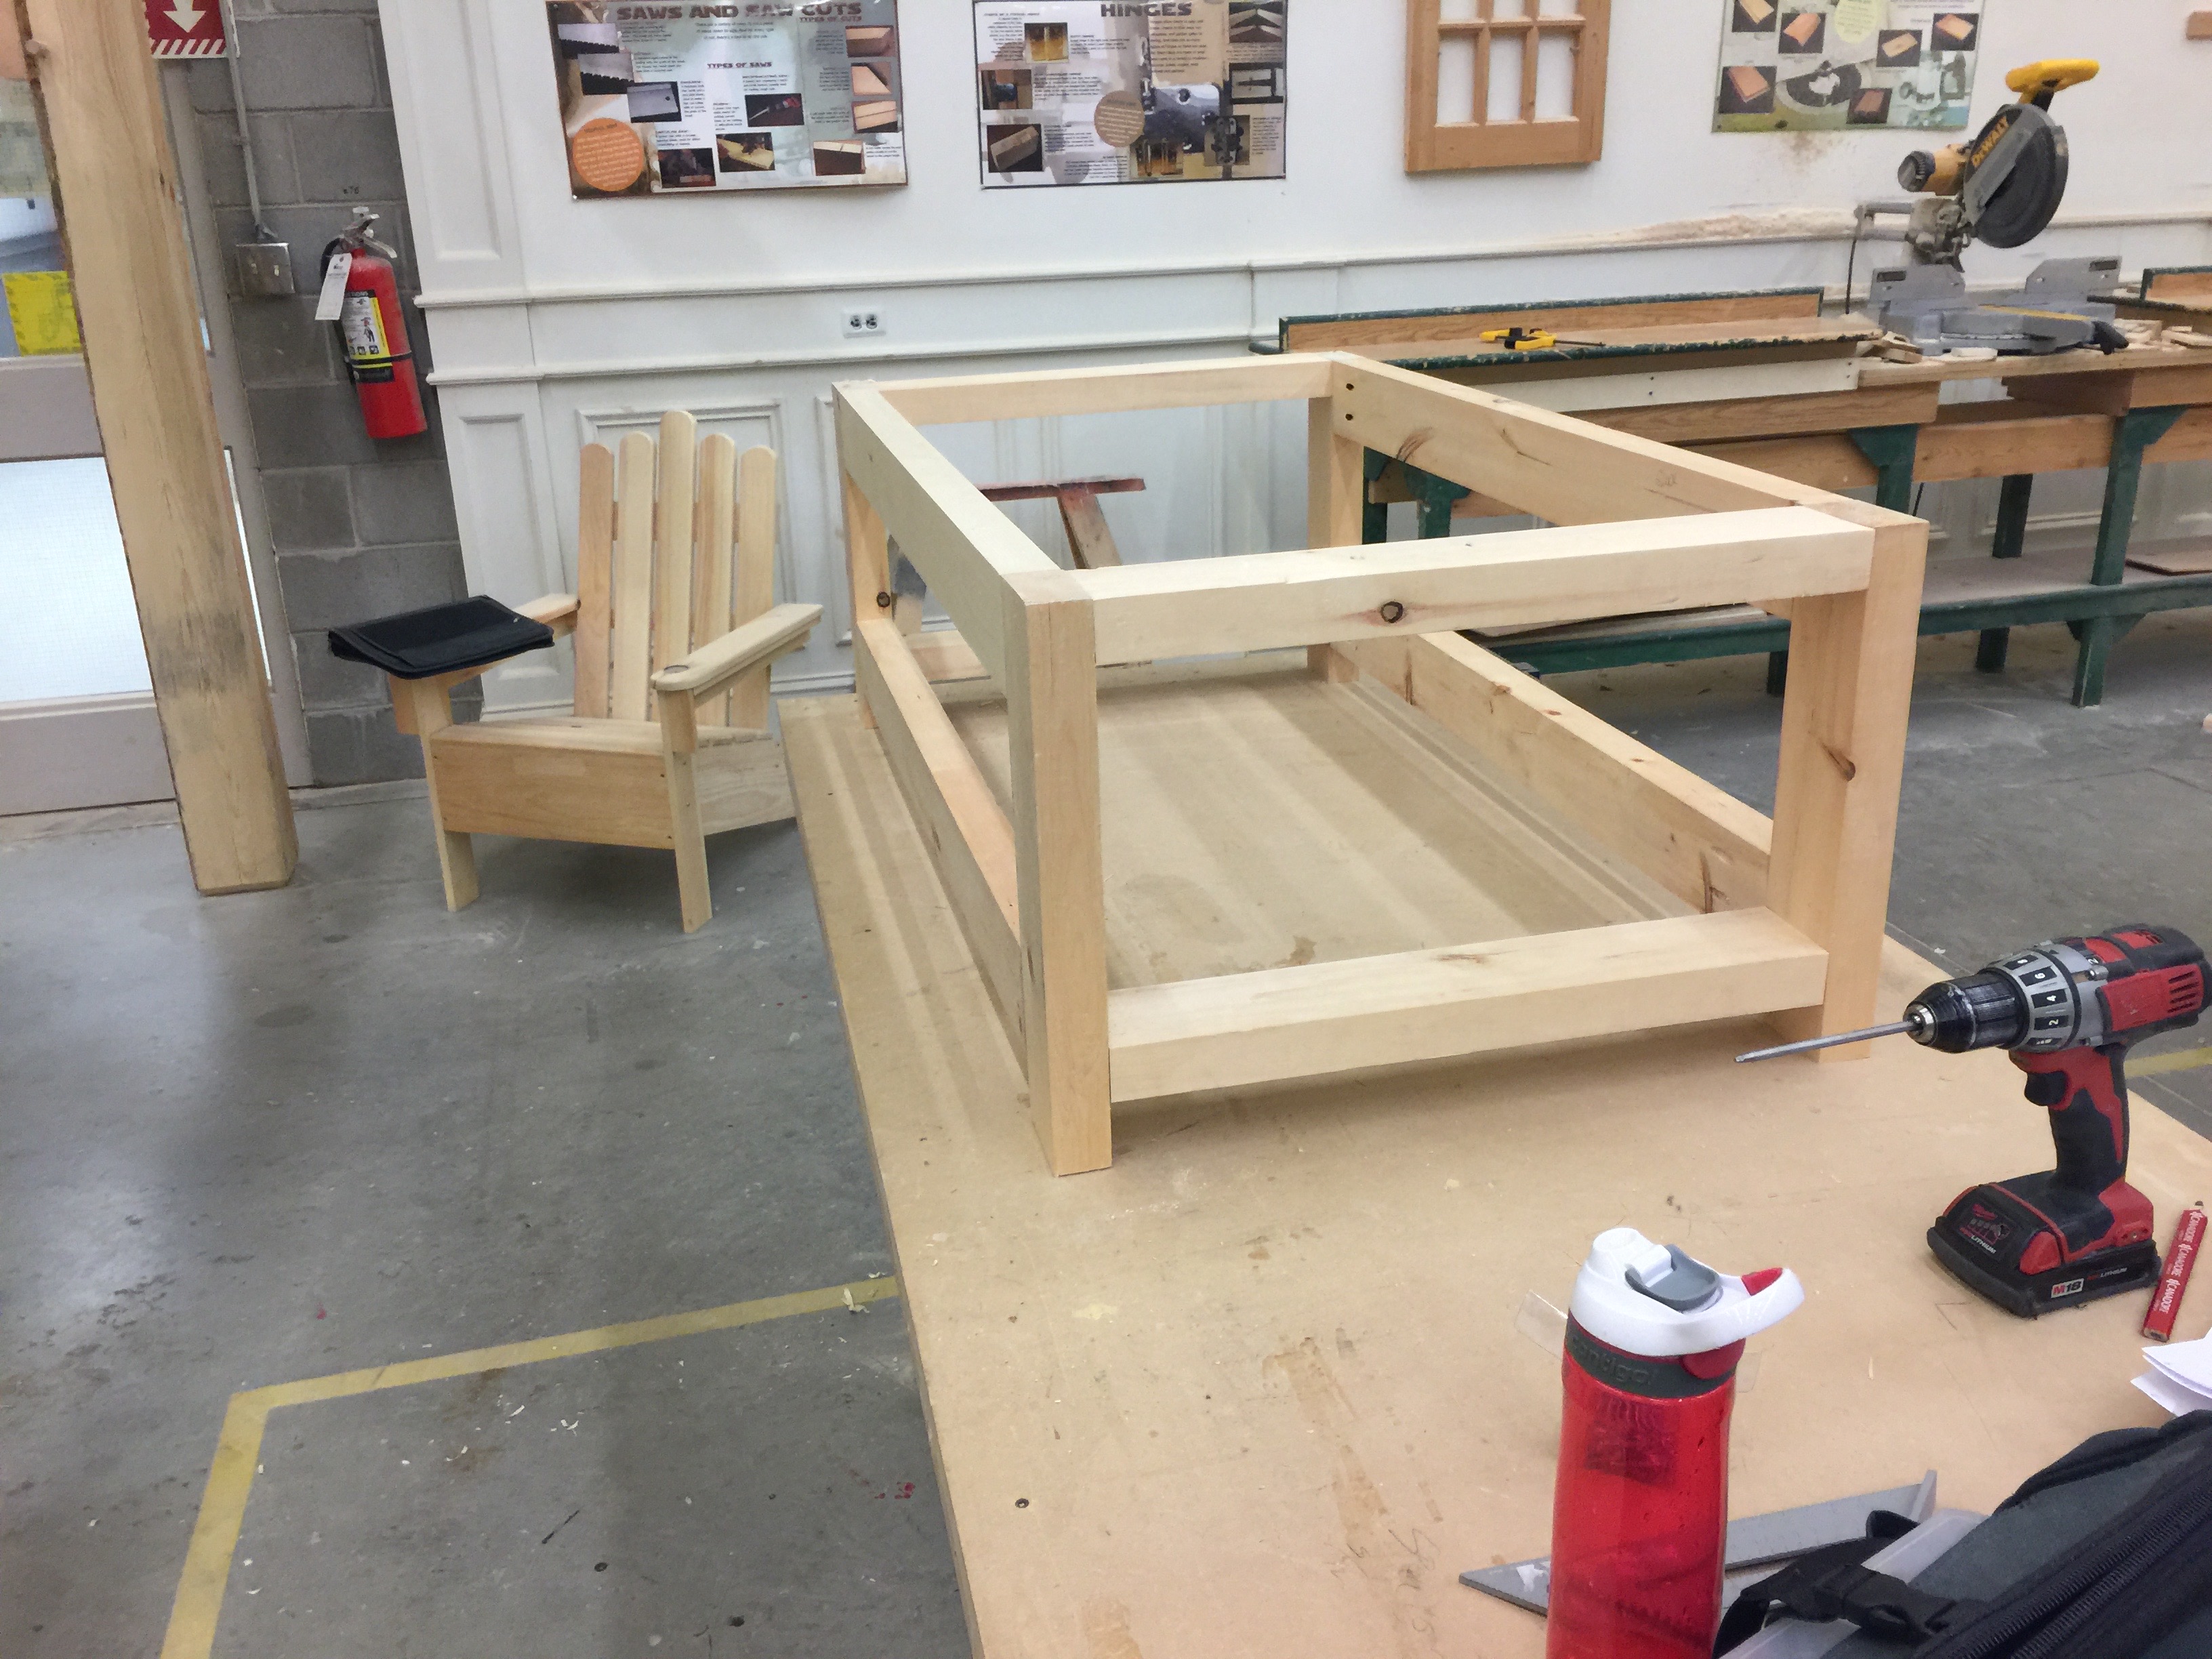
After discussing it with Adam, we decided to kibosh the decorative x’s (YAY!). I figured this way, my kids could climb in and out of the table without getting stuck in the x- also, bonus, I don’t need to build it.
Win-win.
Next Week
That wrapped up my 3 hours of class. Here’s what I plan on tackling next class:
- Attach second bottom rail piece to make the bottom shelf sit flush
- Insert and attach bottom shelf
- Install top shelf pieces
- Sand the whole thing
If things go smoothly, I could be done this next week!
Also, I was thinking… should I stain this like the original pictures show? Should I paint it? I’ve heard of some pretty cool looks while ‘washing’ with paint instead of painting- giving it a distressed look?
Article by: Samantha Dyck, Operations Manager, Hard Hat Hunter
Canadore College announced a partnership with Hard Hat Hunter, a unique social media channel geared towards the trades and construction industries in November 2016.